


How to handle a many-to-many relationship with PHP Generator?
Last modified: Jul 19, 2010
| Prev | Next |
Abstract
Below is a step-by-step explanation of how to create a master-detail presentation for relationships that are multivalued in both directions. The information represented in this article describes the usage of PHP Generators for: MySQL, Microsoft SQL Server, PostgreSQL, Oracle, SQLite, Firebird, IBM DB2, SQL Anywhere, MaxDB.
Problem
Detail presentations for tables linked by one-to-many relationships are created with PHP Generator with a couple of clicks. Let's see the implementation of such presentation for two entities 'employee' and 'office' where one employee can work at more than one office and an office can have more than one employee assigned (a many-to-many relationship).
 Picture 1. Diagram of the many-to-many relationship
In database design, the standard decision of the problem is the breaking of such relationship into two one-to-many relationships and creating a new (junction/link) table to stand between the two existing tables.
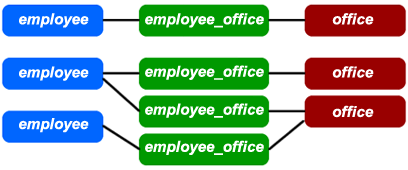 Picture 2. Diagram with the junction table
SQL definitions of the tables are as follows:
CREATE TABLE employee (
  id    int AUTO_INCREMENT NOT NULL,
  name  varchar(50) NOT NULL,
  occupation varchar(20),
  phone varchar(15),
  /* Keys */
  PRIMARY KEY (id)
) ENGINE = InnoDB;

CREATE TABLE office (
  id       int AUTO_INCREMENT NOT NULL,
  address  varchar(200) NOT NULL,
  /* Keys */
  PRIMARY KEY (id)
) ENGINE = InnoDB;
CREATE TABLE employee_office (
  employee_id  int NOT NULL,
  office_id    int NOT NULL,
  /* Keys */
  PRIMARY KEY (employee_id, office_id),
  /* Foreign keys */
  CONSTRAINT employee_office_relation_ibfk_1
    FOREIGN KEY (employee_id)
    REFERENCES employee(id)
    ON DELETE RESTRICT
    ON UPDATE RESTRICT,
  CONSTRAINT employee_office_relation_ibfk_2
    FOREIGN KEY (office_id)
    REFERENCES office(id)
    ON DELETE RESTRICT
    ON UPDATE RESTRICT
) ENGINE = InnoDB;
To see the list of offices and lists of employees assigned to selected offices on one web page, create a PHP script with a master-detail presentation.
Solution
Here are the steps involved in the implementation:
- Configuring datasources
- Specifying a master-detail presentation for the 'office' table
Each step will be covered in detail below. To work with the prepared script, you need to have Linux/Unix or Windows Web Server installed and PHP 5.
Step 1
Add the 'office' table as a datasource using the Add table or view button.
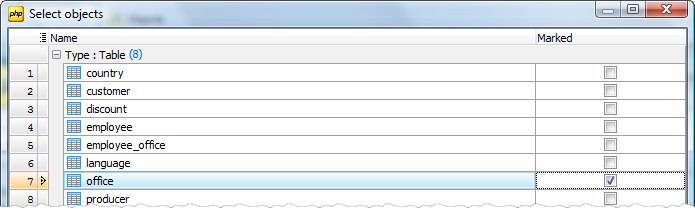 Picture 3. Adding table
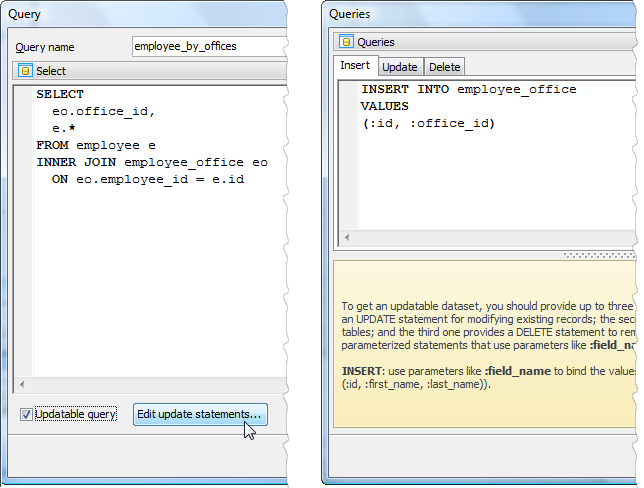
Specify a query to be a datasource for the master-detail presentation. For this purpose use the Create query button and enter the following query text:
SELECT
  eo.office_id,
  e.*
FROM employee e
INNER JOIN employee_office eo
  ON eo.employee_id = e.id
To allow users to insert, update and delete an employee to/from the employee list of the selected office, check the Updatable query box and set update statements:
INSERT INTO employee_office
VALUES
(:id, :office_id)

UPDATE employee_office
SET employee_id=:id
WHERE employee_id=:OLD_id AND office_id=:OLD_office_id

DELETE FROM employee_office
WHERE employee_id=:id AND office_id=:office_id
 Picture 4. Adding an updatable query
Step 2
To specify a master-detail presentation to be used to display a list of employees related to a selected office, open the Page Editor of the 'office' table at the Details tab and follow the Add... link of the popup menu. Set up the Detail relation editor properties: select the created query as Detail data source, 'id' as Master field and 'office_id' as Detail field.
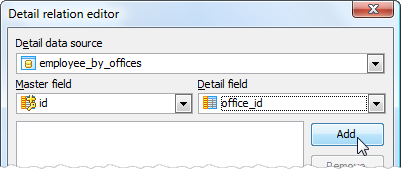 Picture 5. Setting a master-detail presentation
You can also adjust the appearance of the employee lists (details pages) with the Detail page editor. We disallowed the content of 'office_id' and 'id' columns to be represented on the prepared web page (see the screen below).
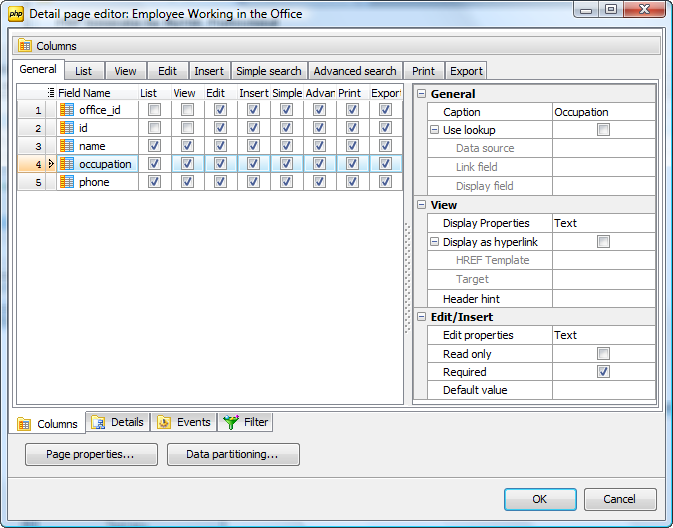 Picture 6. Setting a master-detail presentation
The result web page is shown below:
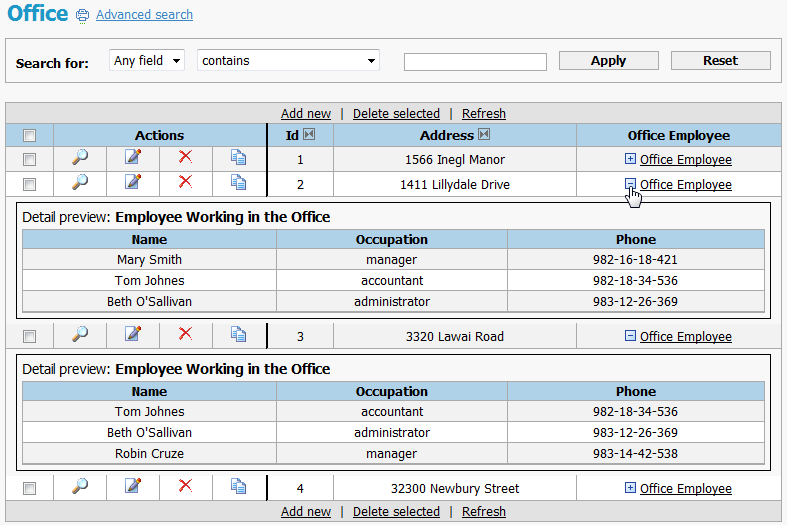 Picture 8. Result script
| Prev | Next |