


How to add inline buttons to a webpage created with PHP Generator?
Last modified: May 3, 2018
| Prev |
Abstract
The article shows how to implement an AJAX-based one-click editor for a logical column in PHP Generator. Live example.
Problem
PHP Generator creates applications that allow to edit data in a separate page, in a modal dialog, and in inline mode. There is also the Quick Edit feature. To edit a record in any of these ways, you need to make at least three operations: click the 'Edit' icon, change data, and push 'Save'.
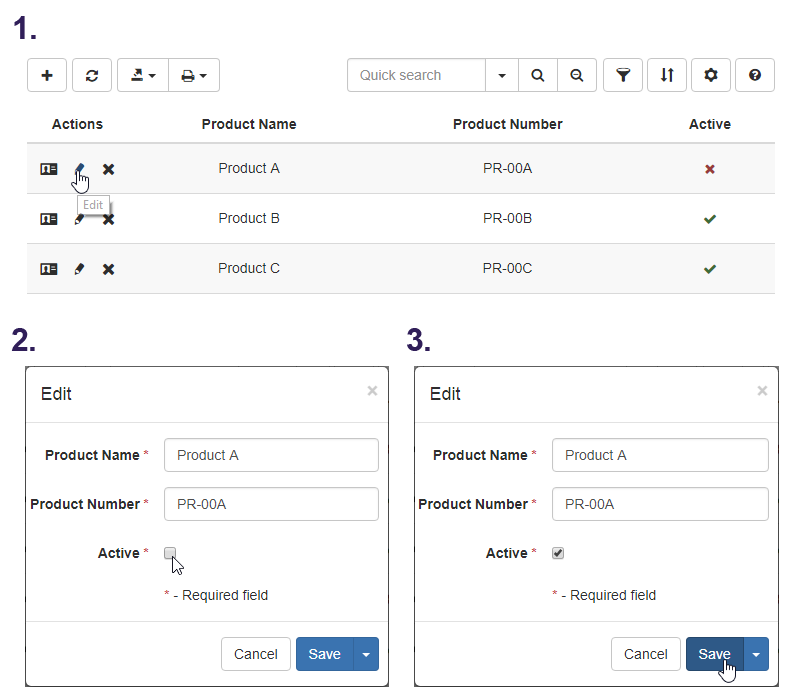 Picture 1. Editing data in a form
However, if the most usual action on working with a webpage is editing of a single column that stored logical values, such manipulations do not seem to be efficient. Our goal is to reduce the number of operations with the help of inline buttons embedded into this column. Such solution allows you to easily switch a column value with a single mouse click as displayed below.
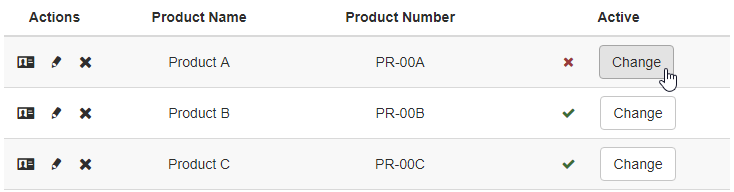 Picture 2. Editing data with inline buttons
Solution
Of course we would like to update the value without reloading the whole page, so we need to use the AJAX technology. To add an AJAX inline button, process as follows:
- Provide the OnCustomRenderColumn event handler to append a button to the column.
- Specify the OnAfterPageLoad event handler to handle the button click and issue an Ajax call.
- Handle passed parameters and execute the query within the OnPreparePage event handler.
To show the implementation of the AJAX button on a webpage created with PHP Generator, we use a sample table containing a list of products with a True/False column storing the product activity. The button is added to this column and used to change the activity.
CREATE TABLE product (
    id      int AUTO_INCREMENT NOT NULL,
    product_name    varchar(50),
    product_number    varchar(255),
    active  int NOT NULL,
    PRIMARY KEY (id)
);
Step 1
To append a button to the column data, provide the OnCustomRenderColumn event handler. This event allows you to customize the cell content according to your needs. Here is the code:
if ($fieldName == 'active') {
    $dataAttributes = sprintf('data-id="%s" data-active="%s"', $rowData['id'], $fieldData);
    $customText = '<span class="product-info" style="display: none;" ' .
        $dataAttributes . '></span>' . $customText;
    $customText .=  '<button class="btn btn-default inline-button" style="margin-left: 25px;">Change</button>';
    $handled = true;
}
Please note we don't display the id column in the grid, so we need to store its value in the cell in order to be able to determine the record that was edited. Also we need to store the current activity of the product. For this purpose we use an invisible <div> tag with two data- attributes.
The screenshot below displays how the event handler looks in PHP Generator.
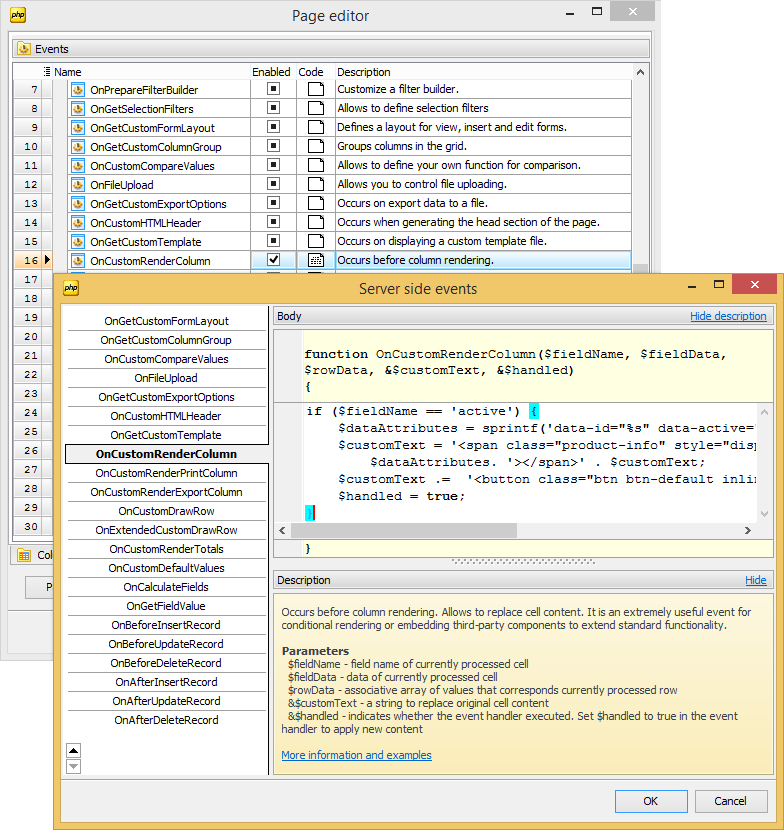 Picture 3. The Events tab of the 'Product' Page Editor and the OnCustomRenderColumn Event Editor
Step 2
At this step we need to handle the button click and issue an AJAX call. This can be accomplished in OnAfterPageLoad event handler.
function prepareInlineButtons() {
    $('button.inline-button').click(function() {
        var self = $(this);
        var checkboxControl = self.siblings('.pg-row-checkbox');
        var productId = self.siblings('.product-info').data('id');
        var activity = self.siblings('.product-info').data('active');
        $.getJSON(location.href, {id: productId, active: activity == 1 ? 0 : 1}, function (data) {
            self.siblings('.product-info').data('active', data.active);
            if (data.active == 1) {
                checkboxControl.addClass('checked')
            }
            else {
                checkboxControl.removeClass('checked')
            }
        })
    })
}
prepareInlineButtons();
Here we use the getJSON function from the jQuery framework as we encode data in this format in the OnPreparePage event (see step 3). The id of the product and its current activity is retrieved from data- attributes created at step 1.
Step 3
At this step we use the OnPreparePage event to update the value in the database and send the output back to the client.
if (GetApplication()->IsGETValueSet('id') && GetApplication()->IsGETValueSet('active')) {
    $id = GetApplication()->GetGETValue('id');
    $active = GetApplication()->GetGETValue('active');
    $sql = "UPDATE product SET active=$active WHERE id=$id";
    $this->GetConnection()->ExecSQL($sql);
    echo json_encode(array("active" => $active));
    exit;
}
In this snippet we use some functions from PHP Generator's server side API. The result is sent to the output with the help of the json_encode function. To simplify the example code, we omitted the problem of SQL injections. The issue is covered in details, for example, in the corresponding article on php.net.
Conclusion
The solution above allows you to optimize the editing of logical columns. You might also want to protect your data from accidental changes with the built-in Javascript confirm function.
Related links
-
 PHP Generator for MySQL
-
 PostgreSQL PHP Generator
-
 MS SQL PHP Generator
-
 Oracle PHP Generator
-
 Firebird PHP Generator
-
 SQLite PHP Generator
-
 DB2 PHP Generator
-
 ASA PHP Generator
-
 MaxDB PHP Generator
| Prev |