

 Download
 Buy
BuyPostgreSQL Maestro online Help
| Prev | Return to chapter overview | Next |
Create Table Wizard
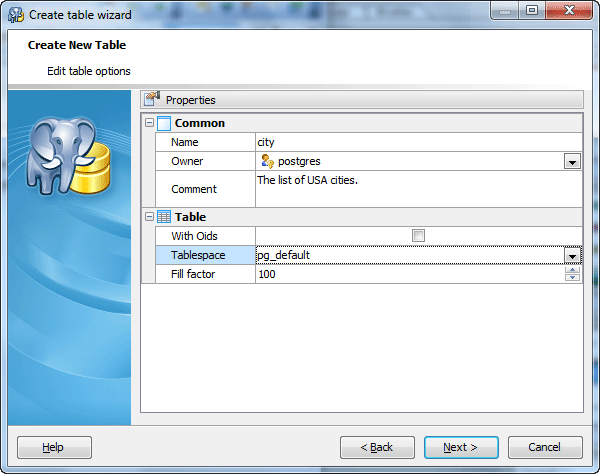
Create Table Wizard guides you through the process of creating a new database table.
The basic principles of Create Object Wizards in PostgreSQL Maestro are explained in a separate topic. Below you will find a description of wizard steps that are unique for the current object.
Name
The name of the table being created as it was specified at the previous step.
Owner
You can specify here the name of the PostgreSQL server user that will own the new table, or leave this field blank to use the default user (namely, the user executing the command). By default, only the owner of an object can perform various operations with the object. In order to allow other users to operate it, privileges must be granted. (However, users that have the superuser attribute can always access any object.)
Comment
Set the optional text to describe the new table.
RLS policy (PostgreSQL 9.5+)
Allows you to manage the row-level policy for the selected table. Possible values are Disabled, Enabled, Enabled and Forced.
 With OIDs
This optional clause specifies whether rows of the new table have OIDs (object identifiers) assigned to them.
Tablespaces
Set the tablespace name to associate with the new table, or leave this field blank to use the template table tablespace. This tablespace will be the default one used for objects created in this table. The default tablespace is based on the template table tablespace.
Fill factor (Since PostgreSQL 8.2)
This storage parameter is a percentage between 10 and 100. 100 (complete packing) is the default. When a smaller fillfactor is specified, INSERT operations pack table pages only to the indicated percentage; the remaining space on each page is reserved for updating rows on that page. This gives UPDATE a chance to place the updated copy of a row on the same page as the original, which is more efficient than placing it on a different page. For a table whose entries are never updated, complete packing is the best choice, but in heavily updated tables smaller fillfactors are appropriate.
Partitioning (PostgreSQL 10+)
Allows you to specify partitioned properties for the table. Description of each property is listed below.
Is Partitioned
Turn this option ON if you want to create a partitioned table.
Strategy
Allows you to specify the partitioning strategy (Range or List)
Partition key
Enter column name or an expression to be used as partition key
Is Partition
Turn this option ON if you want to create a partition.
Parent table
Specify a partitioned table for the new partition
Bound expression
Provide an expression for the new partition
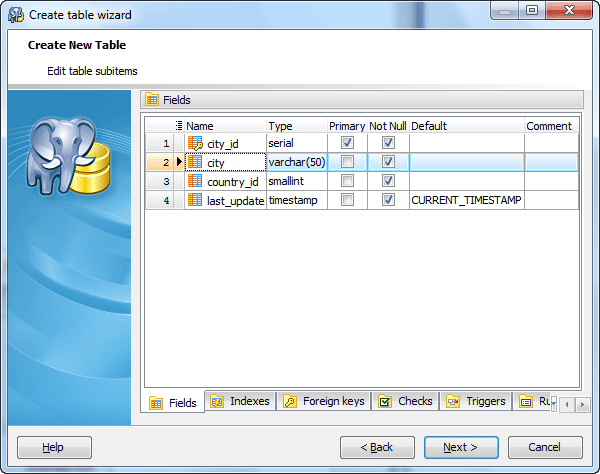
Adding table subitems
On this step of the wizard you can fullfill the new table with fields, indexes, and foreign keys. To add a new object:
| • | Choose the necessary page (Fields - to add table fields, Indexes - table indexes, and so on); |
| • | Follow the corresponding link of the tab's pop-up menu; |
| • | Specify properties of the new object. To find the description of field, foreign key, check, trigger, rule, and index, follow the according link. As Parent tables specify a list of tables from which the new table automatically inherits all columns. |
The popup menu of each tab allows to edit, drop, reorder, and rename specified objects, etc.
Click Add All or Add to include table(s) to table definition. Use the Remove or Remove All items to exclude table(s) from the list.
| Prev | Return to chapter overview | Next |