Oracle Maestro online help
| Prev | Return to chapter overview | Next |
Create View Wizard
Create View Wizard guides you through the process of creating a new view. See How To Create View to learn how to run this wizard.
The basic principles of Create Object Wizards in Oracle Maestro are covered by the corresponding topic. See below to find the description of wizard steps that are unique to the current object.
Selecting fields for a new view
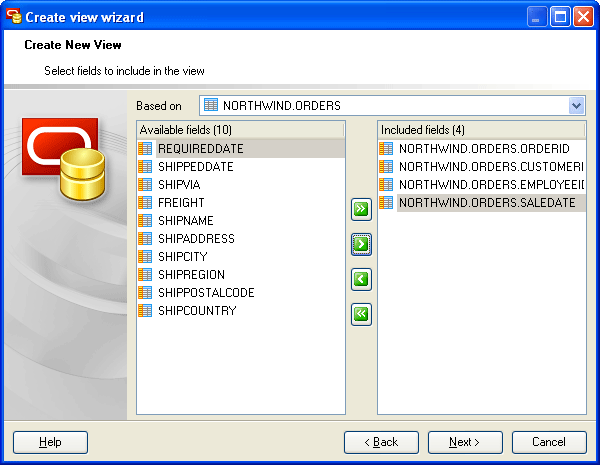
Select a table or a view from the Based on drop-down menu. Then specify which fields will be used in the new view. Use Add All or Add Selected buttons to include field(s) into view definition. Use the Remove Selected or Remove All items to exclude field(s) from the view's field list. Click the Next button to proceed.
Specifying view options
Name
You may specify here the name of the view being created.
Owner
Defines the owner of the new view.
Comment
The box allows you to set optional text describing the view.
 Force view
Specify the option if you want to create the view regardless of whether the base tables of the view or the referenced object types exist or the owner of the schema containing the view has privileges on them. These conditions must be true before any SELECT, INSERT, UPDATE, or DELETE statements can be issued against the view.
 With Check Option
Forces all data modification statements executed against the view to follow the criteria set within the select statement. When a row is modified through a view, the With Check option ensures the data remaining visible through the view after the modification is committed. To check the option the owner of the view table must have been granted the INSERT, UPDATE, or DELETE privilege for the view table.
Specifying the WHERE condition
Oracle Maestro provides the Filter Builder dialog to facilitate a creating of the WHERE condition.
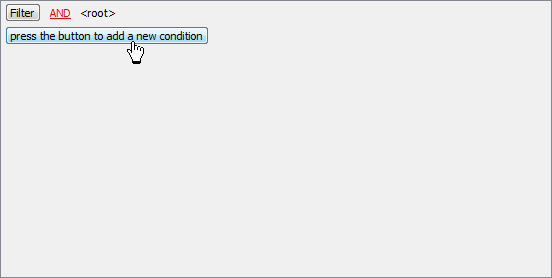
Suppose we need to select orders from the sample table Orders made between 01.02.2010 and 10.02.2010. These criteria are applied to the OrderDate column. Press the button to add this condition. Alternatively, you can use the Filter button and select the Add Condition option from the drop-down menu.
|
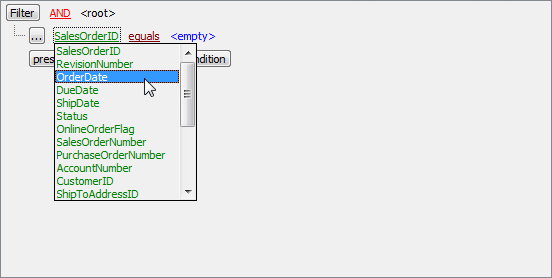
Select the OrderDate column in the drop-down list of the available columns.
|
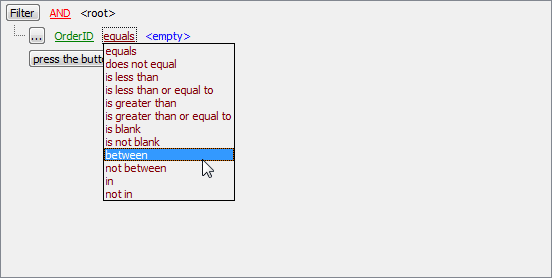
Set the proper operator. In our example it is BETWEEN.
|
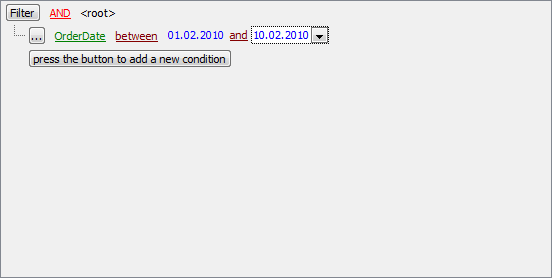
Next, you need to specify the range values for the selected operator. The editor used in value boxes is determined by the editor type assigned to the corresponding column.
Now use the Apply button to see the filter result.
You can add additional conditions to the same root level to be combined by the AND operator. |
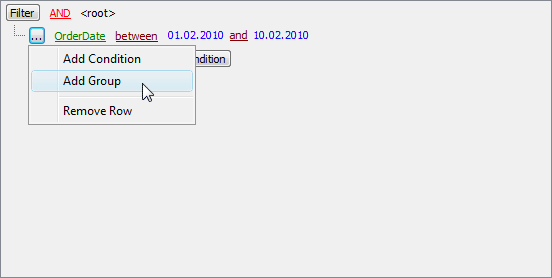
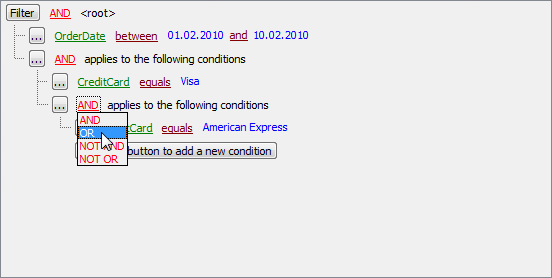
Suppose we need to select orders made between 01.02.2010 and 10.02.2010 and payed via 'Visa' or 'American Express'. This is a complex filter condition combining two simple conditions with the OR operator. Conditions from the same root level are combined by the AND operator. To add a condition combined with the previous one with the OR (NOT AND, NOT OR) operator, use a new group of conditions.
The next screen represents the finished filter conditions for this example. |
Adding view subitems
On this step of the wizard you can specify triggers of the new view.
To add a new object:
Press Insert or use pop-up menu to open the Create Trigger Wizard;
| • | Specify new object properties. |


 Download
 Buy
Buy
