

 Download
 Buy
BuyDB2 PHP Generator online Help
| Prev | Return to chapter overview | Next |
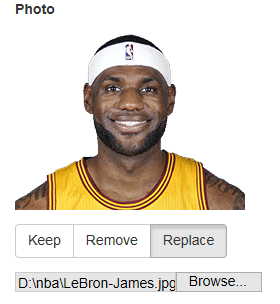
Image upload
Use this control to allow users to upload images to the database. To store images externally, use the Upload Image to Folder control.
Max width
Use this property to restrict the maximum width of the editor (this means that in any screen resolution editor's width will be less or equal then the property value). Can be specified in any units supported by web browsers e.g. 300px, 25em, 50%, etc.
Acceptable file types
The value of this property defines which file types are displayed in the dialog invoked by pressing the Choose File button. The drop down list contains pre-defined values for some common cases.
Use file size limitation
To restrict the size of uploaded files, check this option and specify the maximum allowed file size in kilobytes.
You can save the type, name and size of uploaded files to table columns (optional).
Use image size limitation
To restrict the size of uploaded images, check this option and specify the maximum allowed image width and height.
Uploaded images resizing
To upload resized images, check the Resize image option, select Resize type (Fit by width, Fit by height) and specify the height or width correspondingly.
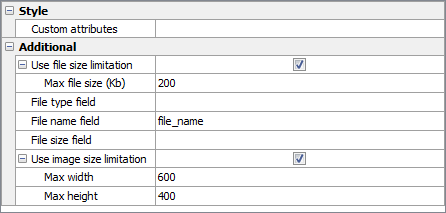
Example
To allow uploading images which size is not greater than 200Kb, width is not greater than 600px and height is not greater than 400px and to save the original file names to the file_name column, specify the Edit properties as follows:
Inline styles
Use this field to set formatting options to be used inside the style attribute of the element. For example, to set the font color and the background color for a control, place the following string to Inline styles:
color: red; background-color: yellow;
Custom attributes
This property allows you to add simple metadata to individual elements, largely for the purpose of providing information to make JavaScript functions easier. Such attributes can be later handled in client-side events. For example, to add several custom attributes to an editor, enter the following string into the Custom attributes edit box:
data-city="Boston" data-lang="js" data-food="Bacon"
It is recommended to prefix all custom attributes with data- to keep the result document compatible with the HTML5 requirements.
See also: Upload Image to Folder, Image (view column)
| Prev | Return to chapter overview | Next |