

 Download
 Buy
BuyDB2 Maestro online Help
| Prev | Return to chapter overview | Next |
Designer Tools and Objects
A blank report is presented as a paper page. At any place on the page, a user is able to add objects, which can display different information (such as text and/or graphics), as well as to define report’s appearance. There is a possibility to use rulers and a grid with a specified size in the Design tab. To enable/disable these options, follow the Configure link at the Navigation Bar and check the corresponding boxes.
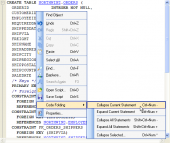
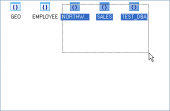
Datasources
To use content of a table (view) column data in a report,
| • | check the necessary database is selected as Database at the Navigation Bar; |
| • | drag the table which data to be used in the report to the Datasources pane at the Navigation Bar; |
| • | drag the necessary column from this pane and drop it to the necessary location on a report page. |
Designer tools:
Select tool
The standard tool to select objects, modify their sizes, etc.
Hand tool
The tool allows dragging a report page.
Zoom tool
When the button is pressed, clicking on the left button doubles the zoom (adds 100%), while clicking the right one zooms out by 100%. When holding the left mouse button while dragging,the selected area would be zoomed.
Edit text tool
Clicking on the text object allows editing its contents right on the report page. If you hold the left mouse button when moving the cursor, the text object appears in the selected place, and then its editor launches.
Copy format tool
The button becomes enabled when the text object is selected. When clicking on the text object with the left button, it copies formatting, which has the previously selected text object, into the object.
Available objects:
Band objects allow to specify where, when, and how to display data and information in reports. Bands are used for logically placing the objects it contains at a location on the
output page. Insert Band adds an area with definite behaviour according to it’s type such basic bands as Header, Footer, Title, and Summary, and databands whose allow to print data from database tables such as Master Data, Detail Data, etc.
Text object displays one or several text lines within the rectangular area.
Picture object displays a graphic file in BMP, JPEG, ICO, WMF, or EMF format.
Subreport object allows inserting an additional report design page inside the basic one.
System text displays service information (date, time, page number, etc), as well as aggregate values.
Draw object represents different geometrical figures (diagonal line, rectangle, rounded rectangle, ellipse, triangle, and diamond).
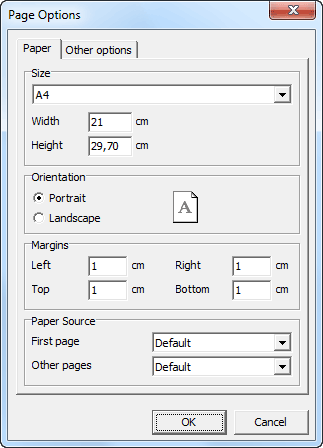
Page options
This dialogue allows you to set the page settings of the prepared. To invoke the window, use the Edit... link of the page blank space popup menu. The dialogue has two pages: Paper and Other options. On the Paper page, you can select size and alignment of paper, as well as set margins. In Paper source drop-down lists you can select a printer tray for the first page and the rest of the report pages.
On Other Options you can set the number of columns for multi-column reports’ printing. The current settings are displayed in the designer.
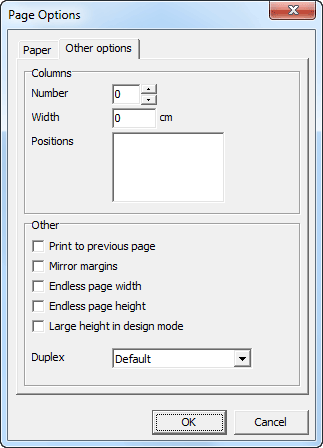
The Print to previous page flag allows you to print pages, beginning from blank space of the previous page. This option can be used in case when a report template consists of several pages or when printing batch (composite) reports.
The Mirror margins option switches right and left margins of page for even pages during previewing or printing a report.
The Endless page width & height option increases page's sizes depending on number of data records on the page (when running a report). In this case you will see one big page in the preview window instead of several standard size pages.
The Large height in design mode option increases page’s height several times more. This feature can be useful if many bands are located in the page, and must be used when working with the overlay band. This only effects the page height in design mode.
| Prev | Return to chapter overview | Next |