


 Download
 Buy
BuyOracle Maestro online help
| Prev | Return to chapter overview | Next |
Create Materialized Views Wizard
Create Materialized View Wizard guides you through the process of creating a new view. See How To Create Materialized View to learn how to run this wizard.
The basic principles of Create Object Wizards in Oracle Maestro are covered by the corresponding topic. See below to find the description of wizard steps that are unique to the current object.
Selecting fields
To specify fields to be used in the view, select a table or a view from the Based on drop-down menu and specify which fields will be used in the new view. Use Add All or Add Selected buttons to include field(s) into view definition. Use the Remove Selected or Remove All items to exclude field(s) from the view's field list. Click the Next button to proceed. If column names are not provided, they are taken from the output column names of the query.
Specifying options
Use this step to set Owner, and Comment for the new materialized view. If not specified, default values are consulted.
Build mode (IMMEDIATE, DEFFERED)
Specify IMMEDIATE to indicate that the materialized view is to be populated immediately. Otherwise, the materialized view is to be populated by the next refresh operation. The first (deferred) refresh must always be a complete refresh.
 Can be refreshed
Use the option to permit the materialized view refresh.
Refresh method (FORCE, FAST, COMPLETE, NEVER)
Specify FORCE to indicate that when a refresh occurs, Oracle Database will perform a fast refresh if one is possible or a complete refresh otherwise. If you do not specify a refresh method (FAST, COMPLETE, or FORCE), then FORCE is the default. Specify FAST to indicate the incremental refresh method, which performs the refresh according to the changes that have occurred to the master tables. Specify COMPLETE to indicate the complete refresh method, which is implemented by executing the defining query of the materialized view. If you request a complete refresh, then Oracle Database performs a complete refresh even if a fast refresh is possible.
Refresh mode (ON DEMAND, ON COMMIT, NEVER)
Specify ON DEMAND to indicate that the materialized view will be refreshed on demand by calling one of the three DBMS_MVIEW refresh procedures. Specify ON COMMIT to indicate that a fast refresh is to occur whenever the database commits a transaction that operates on a master table of the materialized view. This clause may increase the time taken to complete the commit, because the database performs the refresh operation as part of the commit process. The clause is not supported for materialized views containing object types.
With (PRIMARY KEY, ROWID)
Specify PRIMARY KEY to create a primary key materialized view. This is the default and should be used in all cases except those described for ROWID. Primary key materialized views allow materialized view master tables to be reorganized without affecting the eligibility of the materialized view for fast refresh. The master table must contain an enabled primary key constraint. Specify ROWID to create a rowid materialized view. Rowid materialized views are useful if the materialized view does not include all primary key columns of the master tables.
Specifying WHERE condition

Suppose we need to select orders from the sample table Orders made between 01.02.2010 and 10.02.2010. These criteria are applied to the OrderDate column. Press the button to add this condition. Alternatively, you can use the Filter button and select the Add Condition option from the drop-down menu.
|

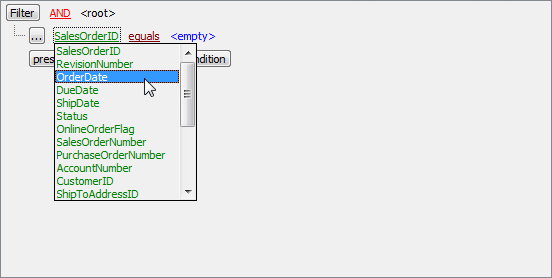
Select the OrderDate column in the drop-down list of the available columns.
|
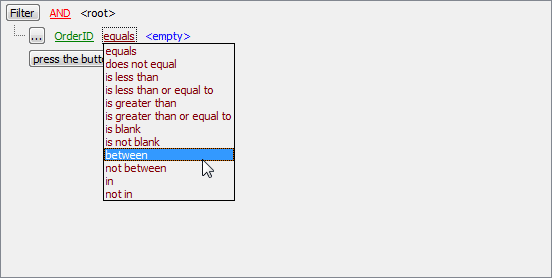
Set the proper operator. In our example it is BETWEEN.
|
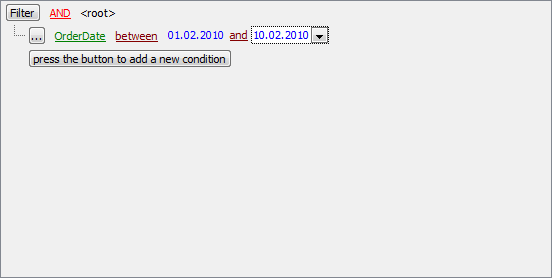
Next, you need to specify the range values for the selected operator. The editor used in value boxes is determined by the editor type assigned to the corresponding column.
Now use the Apply button to see the filter result.
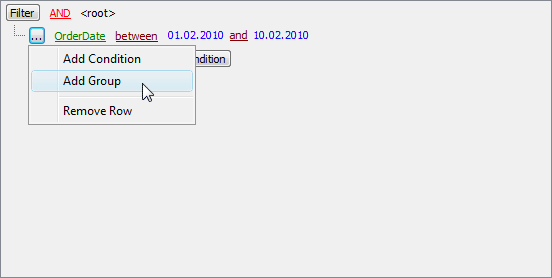
You can add additional conditions to the same root level to be combined by the AND operator. |
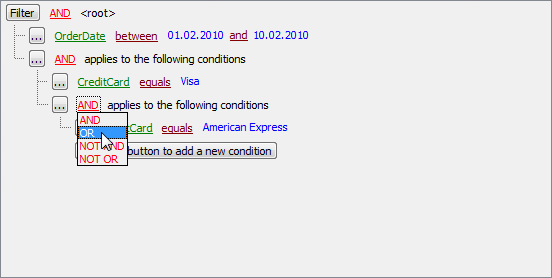
Suppose we need to select orders made between 01.02.2010 and 10.02.2010 and payed via 'Visa' or 'American Express'. This is a complex filter condition combining two simple conditions with the OR operator. Conditions from the same root level are combined by the AND operator. To add a condition combined with the previous one with the OR (NOT AND, NOT OR) operator, use a new group of conditions.
The next screen represents the finished filter conditions for this example. |
See also: Materialized View Editor