


Article: Implementing row level security in MySQL
Last modified: Jun 22, 2009
Abstract
The article contains a step-by-step guide to implementation of row level security in MySQL 5.0 and higher using such MySQL features as views and triggers.
Problem
"Can I have a single database, with only one set of tables to store all clients' information and let each client access only his/her data?" Such questions are not infrequent in MySQL forums. The article introduces a solution of the problem. This solution is based only on built-in MySQL features; moreover, it works independently of application used to connect to the database as all business logic is centralized in the database itself, not in the client apps, and also has no security threats.
The solution assumes the following:
- Your database is on MySQL 5.0 or higher (as we will need views and triggers).
- All your users have their own accounts to connect to MySQL server.
- All the tables on which you want to implement row level security, must have an additional varchar column, to hold the user's name (or any other differentiating parameter like host name).
Consider you have a list of books stored in a single table so that each book is owned by a user. Each user should be able to work only with his/her own books and should not be able to see, edit or delete the books owned by other users.
The initial definition of the table used to store information about books is as follows:
CREATE TABLE books (
  id           int AUTO_INCREMENT NOT NULL,
  title        varchar(80),
  author       varchar(20),
  cover        blob,
  description  text,
  /* Keys */
  PRIMARY KEY (id)
);
Solution
Here are the steps involved in the implementation:- Adding an auxiliary column to the table;
- Creating a view to return only the relevant data to each user;
- Configuring permissions;
- Creating triggers.
Each step will be covered in detail below.
Step 1
Add an additional column 'owner' to the table 'books' to hold the user's name (if such column is lacking). Now the table definition looks as follows:
CREATE TABLE books (
  id           int AUTO_INCREMENT NOT NULL,
  title        varchar(80),
  author       varchar(20),
  cover        blob,
  description  text,
  owner        varchar(30), -- to store book's owner
  /* Keys */
  PRIMARY KEY (id)
);
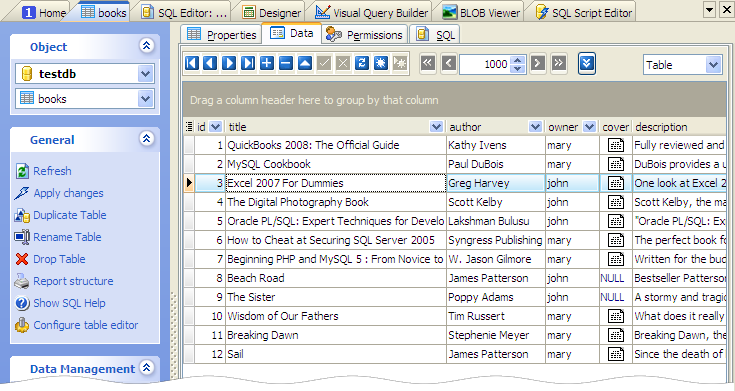 Picture 1. Whole table data (from SQL Maestro for MySQL).
Step 2
Create a view with a WHERE clause in the definition, so that the view returns only the relevant data to each user.
CREATE VIEW user_books(
  title,
  author,
  cover,
  descrition
)
AS
select
  books.title AS title,
  books.author AS author,
  books.cover AS cover,
  books.description AS descrition
from books
where
  (books.owner = substring_index(user(), '@', 1));
The SUBSTRING_INDEX(str, delim, count) function returns the substring from string str before count occurrences of the delimiter delim. If count is positive, everything to the left of the final delimiter (counting from the left) is returned. If count is negative, everything to the right of the final delimiter (counting from the right) is returned.
mysql> SELECT SUBSTRING_INDEX('john@localhost', '@', 1);
        -> 'john'
mysql> SELECT SUBSTRING_INDEX('john@localhost', '@', -1);
        -> 'localhost'
The USER() system function returns the username and hostname combination for the MySQL account that the server used to authenticate the current client. If a user connects to the database with the username 'john', the function in the WHERE clause of the view definition makes sure he can see only those rows that have the 'owner' column set to 'john'. You can also implement such a WHERE clause for any other differentiating parameter like hostname.
This trick eliminates the need to create different views for different users. Whatever be the number of users you have, just one view will suffice.
Step 3
Now it's time to configure permissions.
GRANT SELECT, INSERT, UPDATE, DELETE,
  ON TABLE user_books
TO 'john'@'%';

GRANT SELECT, INSERT, UPDATE, DELETE,
  ON TABLE user_books
TO 'mary'@'%';
As you can gather, these users don't have any permissions on the database tables. They can only access the data using the view. View queries the base table and takes care of security with the USER() function.
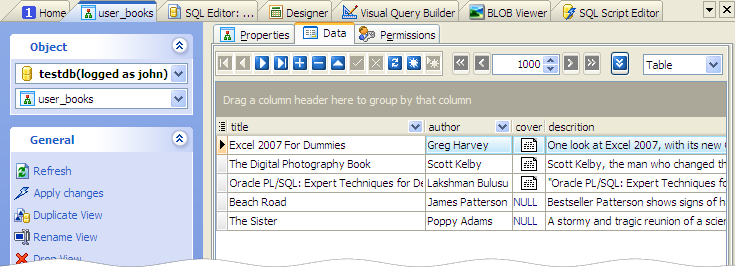 Picture 2. 'user_books' data displayed to John.
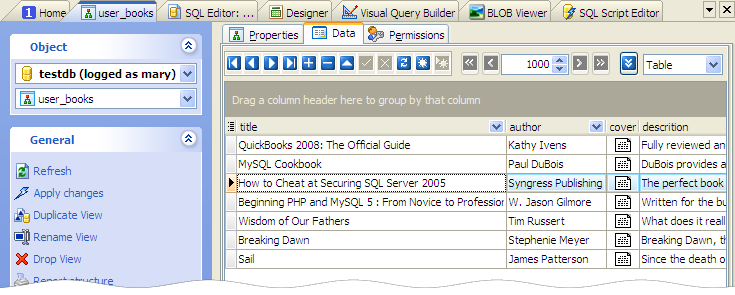 Picture 3. 'user_books' data displayed to Mary.
As written above, this solution works independently of application used to connect to the database. The Picture 4 represents the same data accessible to Mary on a web page that has been created with PHP Generator for MySQL.
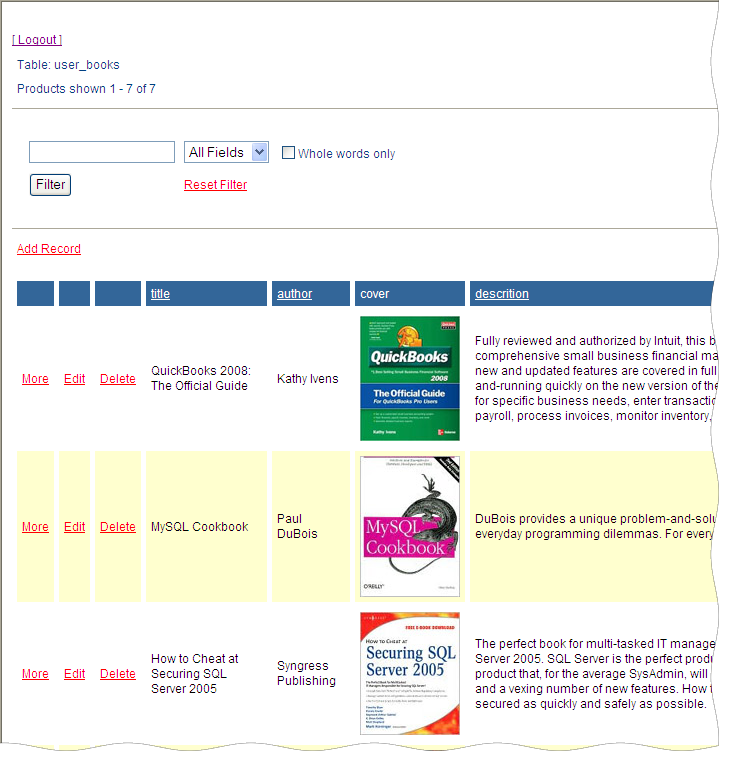 Picture 4. PHP script as it seen by Mary.
Step 4
To fix a newly added row to its owner, create a trigger with the following definition.
DELIMITER |

CREATE TRIGGER tr_books_before_insert
  BEFORE INSERT
  ON books
  FOR EACH ROW
BEGIN
    SET NEW.owner = substring_index(user(), '@', 1);
END|

DELIMITER ;
To prevent the owner replacement, create a trigger to be activated whenever a row is modified.
DELIMITER |

CREATE TRIGGER tr_books_before_update
  BEFORE UPDATE
  ON books
  FOR EACH ROW
BEGIN
        SET NEW.owner = SUBSTRING_INDEX(user(), '@', 1);
END|

DELIMITER ;
With this setup in place, if 'john' connects to the database, he can only see rows inserted by him and can only modify or delete rows that were inserted by him. He will have no clue about the existence of other user's data in the same table.
We hope it gives you a head start, if you are planning to implement row level security in you MySQL databases. Feel free to leave your comments here.